The Ultimate Guide to Exhibiting for the First Time
Everything a first-time exhibitor needs to know, from booking your space to following up after the show. A practical checklist covering stand design, logistics, staffing, materials, and more.

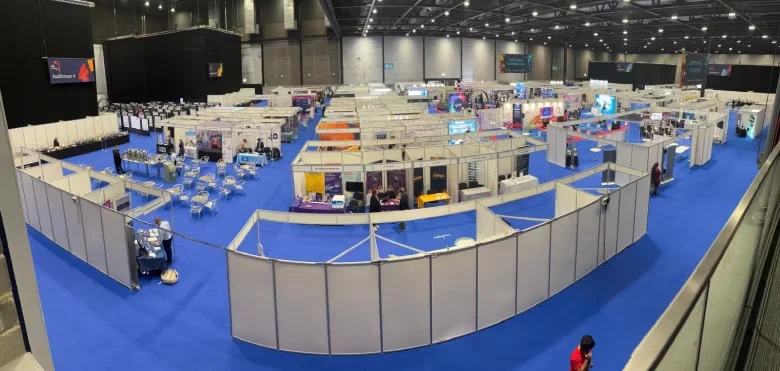
Your first exhibition does not have to be overwhelming
Jumping into your first trade show or conference? It's a fantastic way to get your brand noticed by the right crowd. Nail it, and you'll score leads, build connections, and boost your credibility. Mess it up, and it's a pricey lesson.
The key to nailing your first exhibition is all about being prepared. It's not about how much you spend, the size of your stand, or where you're located on the floor. It's all about planning. The exhibitors who really make an impact are the ones who start early, ask lots of questions, and know exactly what's expected before they even get there.
This guide is your go-to for everything you need as a first-time exhibitor. From booking your spot to wrapping up at the end, we've got you covered. Use it as a checklist, and by the time the show kicks off, you'll be all set with no surprises.
Step 1: Understand what you have booked
First things first, make sure you know exactly what's included in your stand package. It might seem like a no-brainer, but a lot of newbies show up without a clue about what their space includes and what they need to bring themselves.
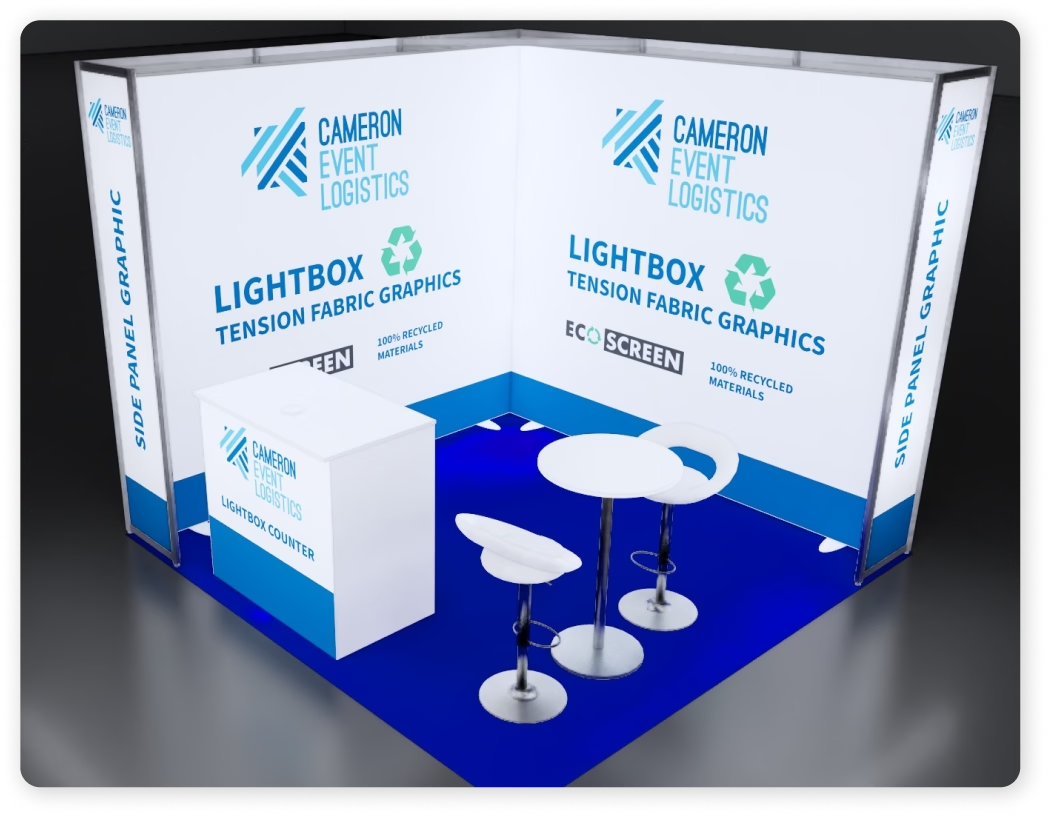
- Shell scheme or space only? Shell scheme is a pre-built modular structure provided by the official contractor, typically including walls, a fascia board with your company name, a carpet, and a basic power supply. Space only is exactly that: a marked area of floor with nothing in it. If you have booked space only, everything from flooring to lighting to furniture is your responsibility to source and bring in.
- What is included in your package? Read your exhibitor manual carefully. Most shows provide a basic furniture package with shell scheme, but it varies. Know exactly what tables, chairs, and power points are included before you start ordering extras.
- What are your stand dimensions? Confirm the exact footprint, including the height restriction. Many venues have different height limits for shell scheme and space only areas, and for stands adjacent to aisles versus island positions.
- Where are you on the floor plan? Understand your position relative to entrances, feature areas, catering points, and seminar theatres. High footfall areas near entrances tend to be busier but noisier. Positions near catering can generate passing traffic but also distraction.
Step 2: Read the exhibitor manual in full
Every show produces an exhibitor manual, usually distributed several weeks before the event. It is one of the most important documents you will receive and one of the most commonly ignored by first-time exhibitors.
The manual contains the rules of the show: what you can and cannot build, what you can and cannot bring in, what the official contractors are, what the deadlines are for ordering services, and what the consequences are for non-compliance.
Key things to look for in the exhibitor manual:
- Build-up and breakdown schedule: When can you access the hall? When should your stand be complete? When does breakdown begin and end?
- Official contractors: Many shows have appointed official contractors for electrics, rigging, AV, and cleaning. In some cases you are required to use them. In others you can use your own supplier but must notify the organiser in advance.
- Health and safety requirements: Most shows require a risk assessment for any stand over a certain height or complexity. If yours requires one, find out early.
- Ordering deadlines: Services ordered through the organiser, such as additional power, furniture, or internet, are almost always cheaper before the deadline than on site.
- Fascia name: If you are in shell scheme, confirm how your company name will appear on the fascia board. Check spelling. Changes requested late or on site may incur a charge.

Step 3: Set clear objectives for the show
This step is often skipped by first-time exhibitors, and it is one of the most important. Before you invest in stand design, staffing, and logistics, define what success looks like for your business/team.
Are you there to drum up some leads? If so, how many are you aiming for, and what kind of quality are you looking for? Maybe you're launching a new product or service and want to boost brand awareness. Or perhaps you're there to catch up with existing clients and strengthen those relationships. You might even be scoping out the competition before deciding on a bigger presence next year.
Each of these objectives leads to different decisions about how you staff the stand, how you brief your team, what materials you bring, and how you follow up after the show. Without clear objectives, it is impossible to evaluate whether the show delivered a return.
Write down your objectives before the show. Measure against them after it.
Step 4: Design your stand with purpose
Your stand design should be driven by your objectives, not by aesthetics alone. A stand that looks impressive but does not facilitate conversation, demo, or lead capture is not doing its job.
- Keep it open: Avoid the instinct to fill every corner. Open stands invite people in. Cluttered stands signal busyness to passers-by and make it harder to have focused conversations.
- Make your proposition clear at a distance: A visitor should be able to understand what you do from ten metres away. Your headline message, whether on a fascia, a hanging banner, or a back wall graphic, needs to be simple and direct.
- Plan for conversation: Where will you have meetings? If you are expecting to have detailed discussions with prospects, you need somewhere to sit that is slightly removed from the main aisle. A high table and stools work. A full meeting room enclosure may be appropriate for larger stands.
- Think about storage: Where will coats, bags, product samples, and literature go? Storage is almost always underestimated by first-time exhibitors.
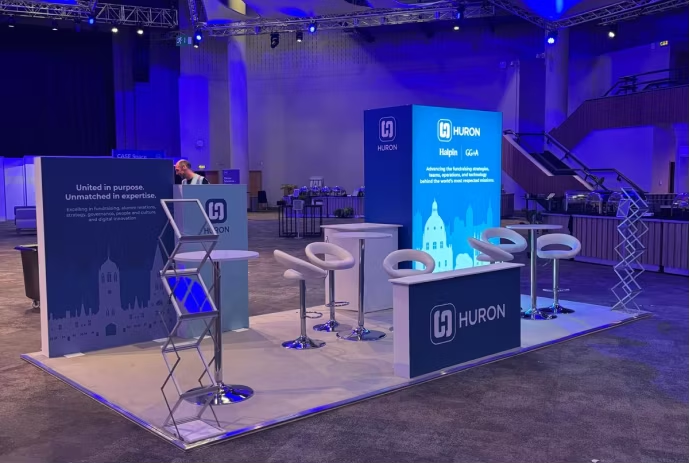
- Lighting matters more than most people expect: Shell scheme lighting is functional at best. If your brand or product requires accurate colour representation, or if you simply want your stand to stand out, additional lighting makes a huge difference.
Step 5: Brief your stand contractor clearly
Whether you are using a shell scheme package with some added graphics or commissioning a bespoke build, your contractor needs a clear brief to deliver the right result.
A good brief includes your stand dimensions and position, your objectives for the show, your brand guidelines including colours, fonts, and logo usage rules, the key messages you want the stand to communicate, any specific functional requirements such as product display, demo screens, or meeting space, your budget, and your deadlines.
If you are ordering graphics for a shell scheme stand, provide artwork at the correct dimensions and in the format your contractor requires. Ask for a proof before anything goes to print. Check it carefully, because errors in graphics are expensive to correct on site and sometimes impossible to fix before the show opens.
Step 6: Sort your logistics early
Logistics is where first-time exhibitors most commonly encounter unexpected costs and stress. The physical movement of stand materials, products, and equipment into and out of a venue is more complex than it appears, and every venue has its own rules.
- Find out the access arrangements: When can vehicles access the loading dock? Is there a one-way system? Are there restrictions on vehicle size? Is there a marshalling area?
- Understand what help is available on site: Most venues have a labour force available during build-up, either provided by the official contractor or available to hire. If you have heavy or bulky items, plan how they will get from the loading dock to your stand position.
- Label everything: Every case, carton, and package should be clearly labelled with your company name, stand number, and the show name. Items that arrive at a venue without clear labelling have a way of not arriving at the right stand.
- Pack a tool kit: Even if you are not building the stand yourself, having a basic kit of tools, cable ties, tape, and fixings on site saves time and money. Things break, things need adjusting, and the official contractor is not always immediately available.
- Plan your breakdown: Breakdown is almost always more rushed than build-up. Have your packing materials ready, know exactly where your collection vehicle will be, and make sure your team knows the breakdown schedule before the show opens.
Step 7: Staff your stand properly
The people on your stand are your most important asset. A beautifully designed stand staffed by unprepared or disengaged people will underperform against a basic shell scheme staffed by a well-briefed, energetic team.
- Brief your team before the show: Everyone on the stand should know your objectives, your key messages, how to qualify a lead, and what to do with the information they collect. Do not assume people know this. Write it down and share it in advance.
- Roster your staff carefully: Long shows are tiring. A team of two covering a three-day show will be exhausted by day two. Roster in breaks, ensure people eat and drink, and if possible bring enough people to allow rotation.
- Establish a lead capture process: How are you collecting contact details? Badge scanning, a paper form, a business card bowl, a tablet-based form? Whatever the method, everyone on the stand needs to use the same one consistently, and the information needs to go somewhere useful after the show.
- Dress consistently: Branded workwear is not mandatory, but it makes your team identifiable and projects professionalism. At minimum, agree on a dress code before the show.
- Manage phones: Nothing undermines a stand presence like staff visibly distracted by their phones. Set a clear expectation before the show opens.

Step 8: Prepare your materials
Think carefully about what you actually need to bring, and resist the instinct to bring everything.
- Literature: Printed brochures and leaflets are still useful, but take fewer than you think you need. Most printed materials handed out at shows are discarded before the visitor gets home. A well-designed one-page summary with a clear call to action and a QR code linking to more information is often more effective than a full brochure.
- Business cards: Still relevant, still expected. Bring more than you think you will need.
- Product samples or demos: If your product benefits from being seen or handled, bring samples. If you are running a demo, test it the day before the show opens and have a contingency if it fails.
- Giveaways: Promotional items can drive footfall but choose something relevant and useful rather than something that will end up in a bin. Quality over quantity.
- Water and snacks: For your team. Venue catering is expensive and often inaccessible during busy periods. A supply of water and easy snacks in your storage area is not a luxury.
Step 9: Know the show schedule inside out
- What time does the show open and close each day? Be on your stand before doors open. Arriving as visitors are already walking the floor is not a good start.
- Are there networking events or evening functions? Many conferences include evening receptions or dinners. These are often where the most valuable conversations happen. Make sure your team is prepared to attend.
- Are there seminar sessions relevant to your clients? If your target audience will be attending a particular seminar, know when it ends so you can expect a wave of footfall afterwards.
- What are the peak times on the floor? The first morning and the lunchtime period tend to be the busiest on most shows. Make sure your best people are on the stand at those times.
Step 10: Follow up quickly after the show
The show is not over when the doors close. The follow-up is where your investment pays off, and it is where most teams fall short.
- Follow up within 48 hours: Leads go cold quickly. A personalised email or call within two days of the show closing is significantly more effective than one sent a week later.
- Personalise your follow-up: Reference the conversation you had. If your lead capture process included notes on what was discussed, use them. A generic follow-up email signals that the conversation did not matter.
- Measure your results: Go back to the objectives you set before the show. How many leads did you generate? How many conversations did you have with existing clients? What did you learn about the competitive landscape? What would you do differently next time? Continuous improvement is key.
- Debrief your team: Within a day or two of the show, get your team together and capture what worked, what did not, and what to change for next time. Memories fade quickly and the insight is most valuable when it is fresh.
Final checklist summary
Use this as your pre-show sign-off checklist:
- Stand package confirmed and exhibitor manual read in full
- Show objectives defined and written down
- Stand design briefed and approved
- Graphics ordered and proofed
- Logistics planned: delivery, on-site labour, breakdown, and collection
- All stand materials labelled
- Team briefed: objectives, messages, lead capture process, dress code
- Lead capture method agreed and tested
- Literature and materials packed
- Show schedule known by all staff
- Follow-up process agreed before the show begins
Exhibiting for the first time is a significant investment of time, budget, and energy. The exhibitors who treat it as a project to be managed, rather than an event to turn up to, are the ones who leave with a pipeline worth having.
If you are preparing for your first show and would like advice on stand build, logistics, or floor planning, Cameron Event Logistics works with exhibitors at every stage of the process.
Frequently asked questions
The most important things to sort early are understanding exactly what your stand package includes, reading the exhibitor manual in full, confirming your logistics arrangements, and briefing your stand contractor with a clear brief and correct artwork. Most problems on site for first-time exhibitors trace back to something that was not confirmed or ordered early enough.
Shell scheme is a pre-built modular structure provided by the show's official contractor, typically including walls, a fascia board, carpet, and basic power. Space only is a marked area of empty floor with nothing included. Shell scheme is generally the more straightforward option for first-time exhibitors, while space only offers more creative freedom but requires you to source and bring in everything yourself.
Follow up within 48 hours of the show closing. Leads go cold quickly, and a personalised email or call referencing the specific conversation you had is significantly more effective than a generic follow-up sent a week later. Make sure your lead capture process includes enough context to personalise your outreach.
Before the show, every member of your stand team should know the objectives for the show, the key messages your company wants to communicate, how to qualify a lead, how you are capturing contact information, and what the show schedule looks like including peak times on the floor.
Cameron Event Logistics works with exhibitors at every stage of the process, from stand design and build to logistics, floor planning, and on-site support. Whether you are exhibiting for the first time or looking to optimise an existing presence, we can advise on what will work best for your brief and budget.




Ready to bring your vision to life?
Join the thousands of organisations who have taken their events to the next level.